Modpack Configuration
When you first load up your Modpack for the fist time, you will see this warning message:
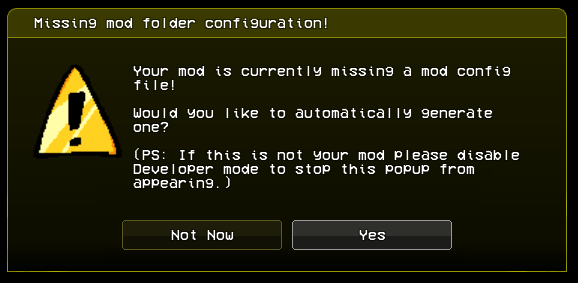
Clicking yes will auto-generate a modpack.ini file for you, and opening it from ./data/config/modpack.ini should look something similar to this:
[Common] # This section applies the 'MOD_' prefix to the flags so you don't have to.
NAME="YOUR MOD NAME HERE"
DESCRIPTION="YOUR MOD DESCRIPTION HERE"
AUTHOR="YOU/YOUR TEAM HERE"
VERSION="YOUR MOD'S VERSION HERE"

# DO NOT EDIT!! this is used to check for version compatibility!
API_VERSION=1

DOWNLOAD_LINK="YOUR MOD PAGE LINK HERE"

# Not supported yet
;MOD_ICON64="path/to/icon64"
;MOD_ICON32="path/to/icon32"
;MOD_ICON16="path/to/icon16"
# The path starts in "your-mod/images/", do not add image extension.
ICON="path/to/icon"

[Flags] # This section doesn't apply any prefix.
DISABLE_WARNING_SCREEN=true
# Set this to false if you want to bring back the warning state (prior to 1.0.0)
# NOTE: Beta warning state has been renamed from BetaWarningState.hx to WarningState.hx
DISABLE_LANGUAGES=true
# Some people might not translate their mods, but if you do then you may set this to false

[Discord] # This section applies the 'MOD_DISCORD_' prefix to the flags so you don't have to.
CLIENT_ID=""
LOGO_KEY=""
LOGO_TEXT=""

[StateRedirects] # This section is used for state redirecting, see examples below.
;StoryMenuState="funkin.menus.FreeplayState"
;FreeplayState="scriptedFreeplayState"

[StateRedirects.force] # Use this if you want to override redirects set by subsequent addons/mods
This is your INI file, a.k.a your Initialization file. Anything you edit here, changes the constants in the Flags class.
You can add your own custom Flag by adding it into the INI file, like so:
; These flags will be findable in the `customFlags` variable in the `Flags` class.
# You can comment with `;` or `#` if you want to, in Visual Studio Code, you can press `Ctrl + /` to comment selected lines, which will default with `;`
[Flags]
NEW_FLAG=true
ANOTHER_FLAG="Hello World"

[Custom Section]
SECTION_PROPERTY="yellow"
NOTE: Flags does mention a flags.ini file, but this only activates if your Library isn't a IModAssetsLibrary, which will be the case for all your mods, unless you force load a mod from OpenFL's AssetLibrary. Otherwise you can just ignore that.
State Redirects
This is something that you will be most likely using a LOT, as the reason it exists in the engine directly was because of a simple Global Script code that would automatically override State's to Redirect them to your own custom state.
It was so useful that almost every project contained the same code, it was even featuered in this wiki under the old Useful script snippets for modders section.
You can redirect ANY state by inputting the Class Name, and setting it to a string that points to either a new Class State, or a ModState Script!
[StateRedirects]
TitleState="funkin.menus.MainMenuState"
StoryMenuState="MyCustomState"
Using StateRedirects.force is reserved for Addons, but using it in mods is the same as using StateRedirects. Will override any StateRedirects set by other Mods.
Discord Configuration
If you are migrating from Legacy to v1.0.0 or above, your old config/discord.json will still work, but if not, I recommend you use modpack.ini instead, for consistency.
If you do not know how to setup Discord Intergration, we will go over it in this section. Otherwise you can skip this.
⚙️ Discord Intergration
Codename Engine allows modpacks to configure Discord Rich Presence integration. This is the main component that allows displaying the game being currently played by a user on Discord.
Assuming that you've already created the Discord application for the modpack, you'll see the Application ID. This is adjacent to the CLIENT_ID flag in the Discord section. Copy the application ID into the flag to allow Codename to recognize your Discord application.
Art assets can be added to the application for Rich Presence by navigating to the Rich Presence menu on the sidebar, and adding the asset you need.
Do note that the modpack configuration only supports the large image key, so you only need to add a single asset.
Once you've added your asset, preferably following Discord's recommendations,
you can use the Rich Presence visualizer to use your asset and display it as the large image key. You can then place the name of the asset key as the value of the Discord section's LOGO_KEY flag.
The large image text is the tooltip text displayed upon hovering over it with your mouse. You can set this using the LOGO_TEXT flag
like the other two flags.
Here is what your modpack.ini should look like
[Discord] # This section applies the 'MOD_DISCORD_' prefix to the flags so you don't have to.
CLIENT_ID="<MY CLIENT ID FROM Discord Developer Portal>"
LOGO_KEY="<Logo image name>"
LOGO_TEXT="Hey guys! Look im text!!"
Do note that the modpack configuration isn't the only way to configure Discord Rich Presence. Although fairly undocumented, DiscordUtil provides additional options for setting up Discord Rich Presence, but requires scripting.
Miscellaneous Information
As of right now, MOD_ICON, ICON, DOWNLOAD_LINK do nothing. There are plans in the future to use these configuration, but they are not required.